
Table of Contents
- Introduction
- Accessing cPanel
- Navigating to phpMyAdmin
- Locating Your WordPress Database
- Changing the Password in phpMyAdmin
- Testing Your New Password
- Additional Tips for WordPress Security
1. Introduction
Changing your WordPress password is an essential skill for any site owner. Whether you've forgotten it or need to enhance your website's security, the process can be straightforward when done via cPanel. Unlike the traditional method of resetting a password through the WordPress login page, this method works even if you can’t access the login screen. Here’s a comprehensive, step-by-step guide to help you reset your WordPress password using cPanel’s tools.
2. Accessing cPanel
To begin the process of changing your WordPress password, you first need to access your cPanel account. Most hosting providers offer cPanel access, which is typically available through a URL such as http://yourdomain.com/cpanel or http://yourdomain.com:2083. Once you’ve logged into your cPanel account using your hosting credentials, you’ll be able to make changes to the backend of your website, including resetting your WordPress password.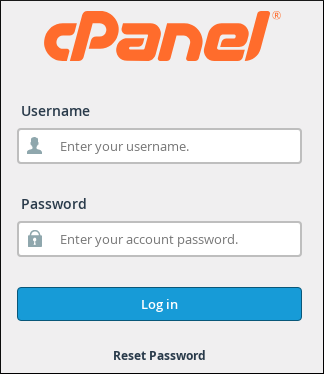
3. Navigating to phpMyAdmin
Once inside your cPanel account, locate the phpMyAdmin icon under the Databases section. PhpMyAdmin is a powerful tool that allows you to manage your website's databases. WordPress stores all its user information, including passwords, in a database, so we’ll use phpMyAdmin to modify the password.
Click on phpMyAdmin, and you will be taken to a new page that lists all the databases associated with your website. Look for the database that corresponds to your WordPress installation—this is often named after your website or "wp_" followed by a random string of characters. Once you've located it, click on the database to open it.
4. Locating Your WordPress Database
Inside your WordPress database, you’ll find several tables. The table that holds your user information is usually named wp_users (unless you’ve changed the default prefix). Click on the wp_users table, and you’ll see a list of all users who have access to the WordPress site. Find the row corresponding to the username for which you want to change the password, and click the Edit link beside it.
5. Changing the Password in phpMyAdmin
In the Edit User page, you’ll see several fields. Locate the user_pass field, which stores your WordPress password. Next to the user_pass field, you'll see a drop-down menu. Select the option for MD5 from this menu—this is the method WordPress uses to store passwords securely.
In the Value field, delete the existing password and enter a new one. Be sure to choose a strong, unique password for security purposes. Once you’ve entered the new password, click the Go button to save the changes.
6. Testing Your New Password
Once you've updated your password in phpMyAdmin, head over to your WordPress login page (usually found at http://yourdomain.com/wp-login.php). Enter your username and the new password to ensure that the update was successful. If you can log in without issues, you've successfully changed your password!
7. Additional Tips for WordPress Security
Changing your WordPress password is a crucial step, but it’s only part of securing your website. Here are some additional tips to enhance your site’s security:
- Use Two-Factor Authentication: Implementing 2FA adds an extra layer of protection by requiring a second form of identification in addition to your password.
- Install a Security Plugin: Plugins like Wordfence or Sucuri can provide extra protection against brute force attacks and malware.
- Update WordPress Regularly: Ensure that your WordPress software, themes, and plugins are up-to-date to prevent vulnerabilities.
- Use Strong Passwords: Always choose a strong, unique password for your WordPress admin and database.

You must be logged in to post a comment.