
Table of Contents
- Introduction to SitePad Website Builder
- Accessing SitePad in cPanel
- Creating a New Website with SitePad
- Customizing Your Website Design
- Adding and Managing Website Content
- Publishing Your Website
- Managing SitePad Settings and Backup
1. Introduction to SitePad Website Builder
SitePad is a user-friendly, drag-and-drop website builder available in cPanel. It allows users to create fully functional websites without requiring coding skills. SitePad offers:
- Over 500 pre-designed templates
- A drag-and-drop editor for easy customization
- Integrated SEO tools
- A responsive design for mobile compatibility
If you are hosting your website through cPanel, SitePad can be a great tool to build and manage your site efficiently.
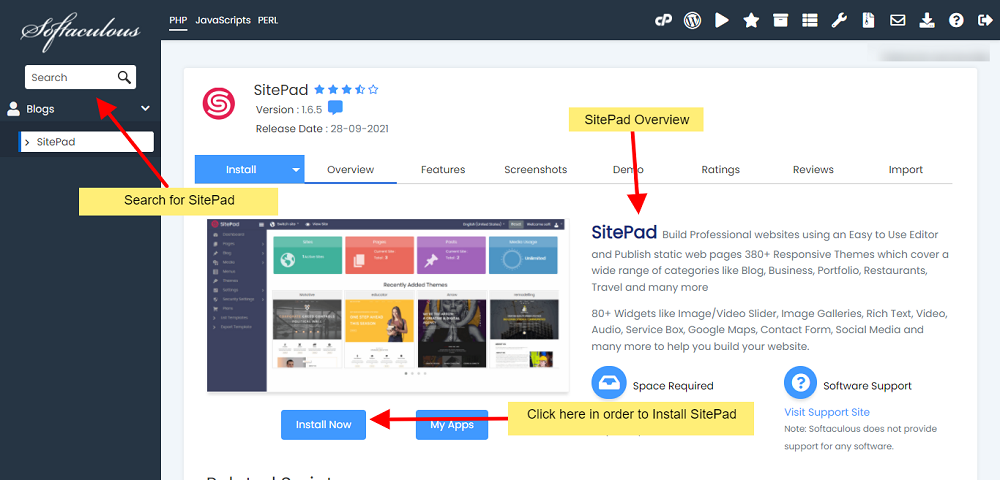
2. Accessing SitePad in cPanel
To start using SitePad, follow these steps:
- Log in to cPanel: Access your hosting account and enter your cPanel dashboard.
- Locate SitePad: Scroll down to the "Software" section and find the SitePad Website Builder icon.
- Launch SitePad: Click the SitePad icon to open the website builder interface.
- Select Your Domain: If you have multiple domains, choose the one you want to build your website on.
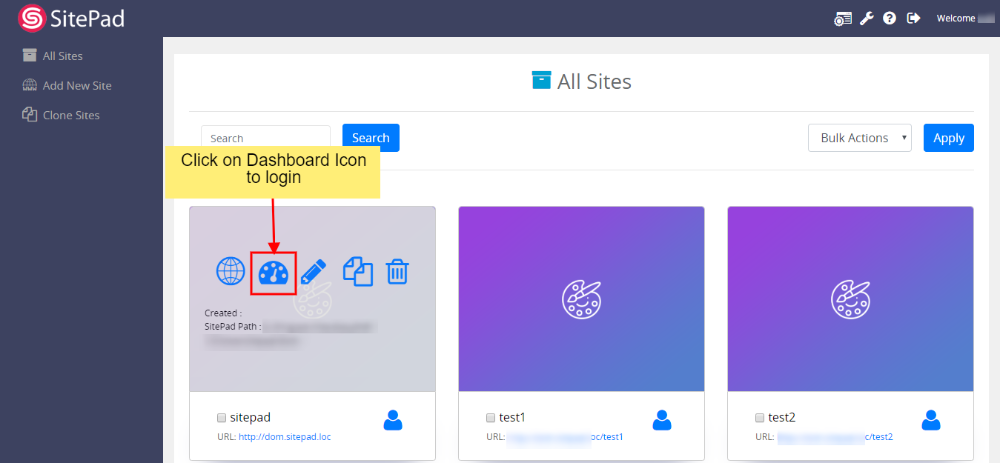
Once SitePad loads, you will see the main dashboard where you can start building your site.
3. Creating a New Website with SitePad
To set up your website:
- Click on ‘Create New Site’ in the SitePad dashboard.
- Choose a Template: Browse through SitePad’s collection of templates and select one that suits your website’s purpose.
- Set Website Details: Enter your website’s title and tagline.
- Click ‘Start Building’ to proceed to the SitePad editor.
SitePad will now generate your website, allowing you to customize it before publishing.
4. Customizing Your Website Design
Once inside the editor, you can customize the look and feel of your website using the drag-and-drop interface. Key customization options include:
- Editing Text: Click on any text section to modify content.
- Changing Images: Replace default images with your own by clicking on an image and uploading a new file.
- Adjusting Layouts: Move, resize, or delete sections as needed.
- Styling Elements: Customize fonts, colors, and backgrounds to match your branding.
To save your changes, click Save in the top menu.

5. Adding and Managing Website Content
Content plays a crucial role in your website’s effectiveness. In SitePad, you can add and organize content as follows:
- Adding New Pages: Click on Pages > Add New Page to create new content sections like About, Services, or Contact.
- Inserting Media: Upload images, videos, and documents by clicking the Media tab.
- Adding Widgets: Use the drag-and-drop feature to insert elements like:
- Contact Forms
- Social Media Links
- Google Maps
- Blog Posts
Regularly updating your content ensures better engagement and improved SEO rankings.

6. Publishing Your Website
After designing and adding content, it’s time to publish your site:
- Click on the ‘Publish’ Button in the SitePad editor.
- Verify Your Domain Settings: Ensure the correct domain is selected for publishing.
- Confirm Your Changes and click Publish.
- Preview Your Website: Open your domain URL in a browser to check the live version.
If any changes are needed, you can return to SitePad and edit the website anytime.

7. Managing SitePad Settings and Backup
To ensure your website remains secure and functional, follow these management tips:
- Backup Your Website: Regularly create backups from your hosting control panel to prevent data loss.
- Update Content Frequently: Keep your website updated with fresh content and new features.
- Optimize Performance: Use SitePad’s built-in SEO tools to improve loading speed and search rankings.
- Check Compatibility: Ensure your website displays correctly on both desktop and mobile devices.
By following these steps, you can efficiently manage and maintain your SitePad-built website without technical difficulties.


You must be logged in to post a comment.