
Table of Contents
- Introduction
- Accessing cPanel
- Creating a New Database
- Managing Your Database with phpMyAdmin
- Connecting a Database to Your Website
- Backing Up and Restoring Databases
- Securing Your Database
1. Introduction
Databases are the backbone of many websites, storing vital information such as content, user data, and settings. For WordPress users, databases are where posts, comments, and configurations are saved. In cPanel, creating and managing databases is a straightforward task that gives you full control over your website's data. This guide walks you through the process of creating, managing, and maintaining databases in cPanel, from the basics of database creation to advanced management with tools like phpMyAdmin.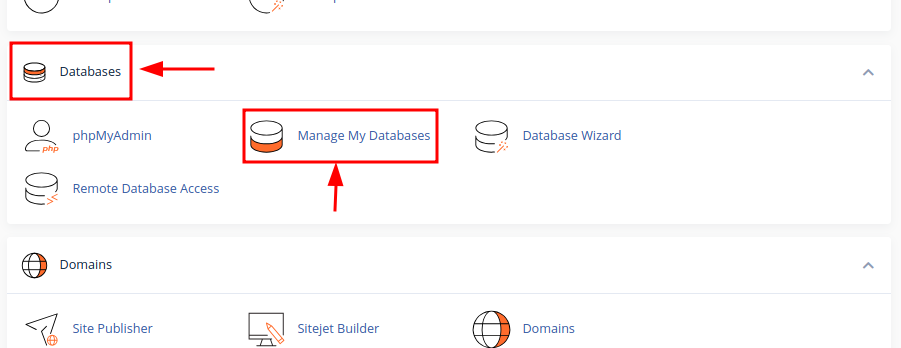
2. Accessing cPanel
To get started with creating and managing a database, you need to access cPanel. Your hosting provider should have given you a unique URL to log in to your cPanel, usually in the format http://yourdomain.com/cpanel or http://yourdomain.com:2083. Use your login credentials to enter the cPanel dashboard. Once logged in, you’ll have access to a variety of tools, including those for managing databases.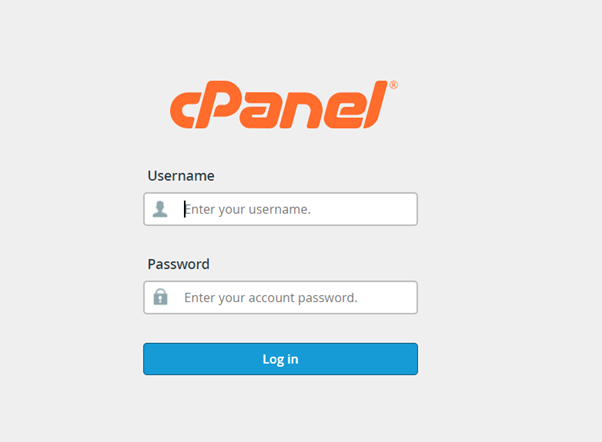
3. Creating a New Database
Creating a new database in cPanel is easy, thanks to the MySQL Databases tool. Here’s how to do it:
- In cPanel, scroll down to the Databases section and click on MySQL Databases.
- Under the Create a New Database section, enter a name for your new database. Make sure the name is unique and descriptive for easy identification later.
- Click Create Database. Once the database is created, cPanel will display a success message along with the database’s name.
- To ensure that the database is usable, you’ll need to add a user. Scroll down to the MySQL Users section and create a new user with a secure password.
- After creating the user, add the user to your newly created database by selecting the user and the database, then clicking Add.

4. Managing Your Database with phpMyAdmin
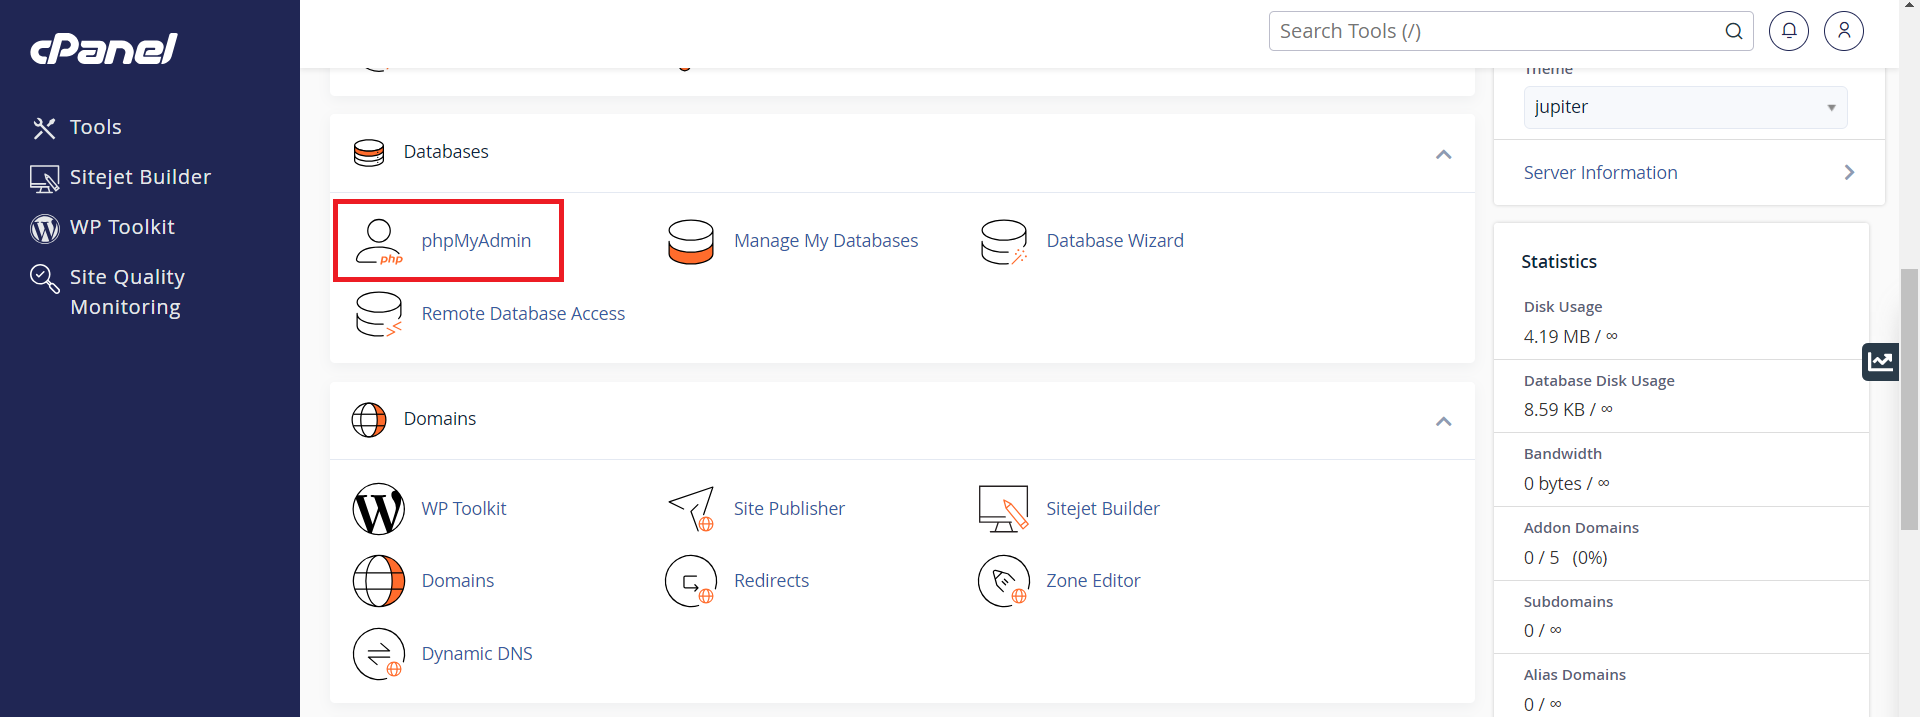
phpMyAdmin is a powerful tool in cPanel that allows you to manage your databases directly. To access phpMyAdmin:
- In cPanel, under the Databases section, click on phpMyAdmin.
- You’ll be redirected to phpMyAdmin, where all of your databases will be listed on the left-hand side.
- Select the database you want to manage. From here, you can:
- Edit tables: Modify data, add new records, or change the structure of tables.
- Execute queries: Run SQL queries for more advanced database management tasks.
- Export and import: Backup or restore your database by exporting it to a file or importing it from an external source.
- Manage users: Add or delete database users, set permissions, and control who can access the database.
5. Connecting a Database to Your Website
Once the database is created, you’ll need to connect it to your website. For content management systems like WordPress, this connection is typically set during the installation process. However, for custom websites, you’ll need to manually configure the connection:
- Locate your website's configuration file (for WordPress, this is usually the
wp-config.phpfile). - In this file, you'll need to provide the following information:
- Database name: The name of your newly created database.
- Database username: The user you created for the database.
- Database password: The password associated with that user.
- Database host: Usually
localhost, but check with your hosting provider if you’re unsure.
Once these details are entered, your website will be able to communicate with the database, allowing it to store and retrieve data.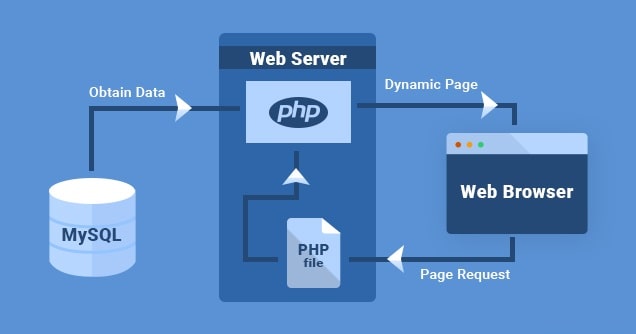
6. Backing Up and Restoring Databases
Backing up your database is crucial to ensure your data is safe. To back up a database in cPanel:
- Go to phpMyAdmin and select the database you want to back up.
- Click the Export tab.
- Choose the export method (Quick or Custom). For most users, Quick is sufficient.
- Click Go to download the backup file.
To restore a database, go to phpMyAdmin and select the Import tab. Upload the backup file you previously saved, and phpMyAdmin will restore the database.
7. Securing Your Database
Database security is essential for preventing unauthorized access. Here are some steps you can take to secure your database:
- Use strong passwords: Always choose long, complex passwords for your database users.
- Limit database access: Only allow necessary users to access the database and restrict IP addresses that can connect to it.
- Regular backups: Always keep a recent backup of your database in case you need to restore it.
- Update your website software: Ensure your website’s content management system and other software are up to date to minimize vulnerabilities.


You must be logged in to post a comment.