
Table of Contents
- Understanding DNS and Its Role in Website Management
- Common Types of DNS Records in cPanel
- How to Access the DNS Zone Editor in cPanel
- Creating and Modifying DNS Records in cPanel
- Troubleshooting Common DNS Issues
- Best Practices for Managing DNS Records
1. Understanding DNS and Its Role in Website Management
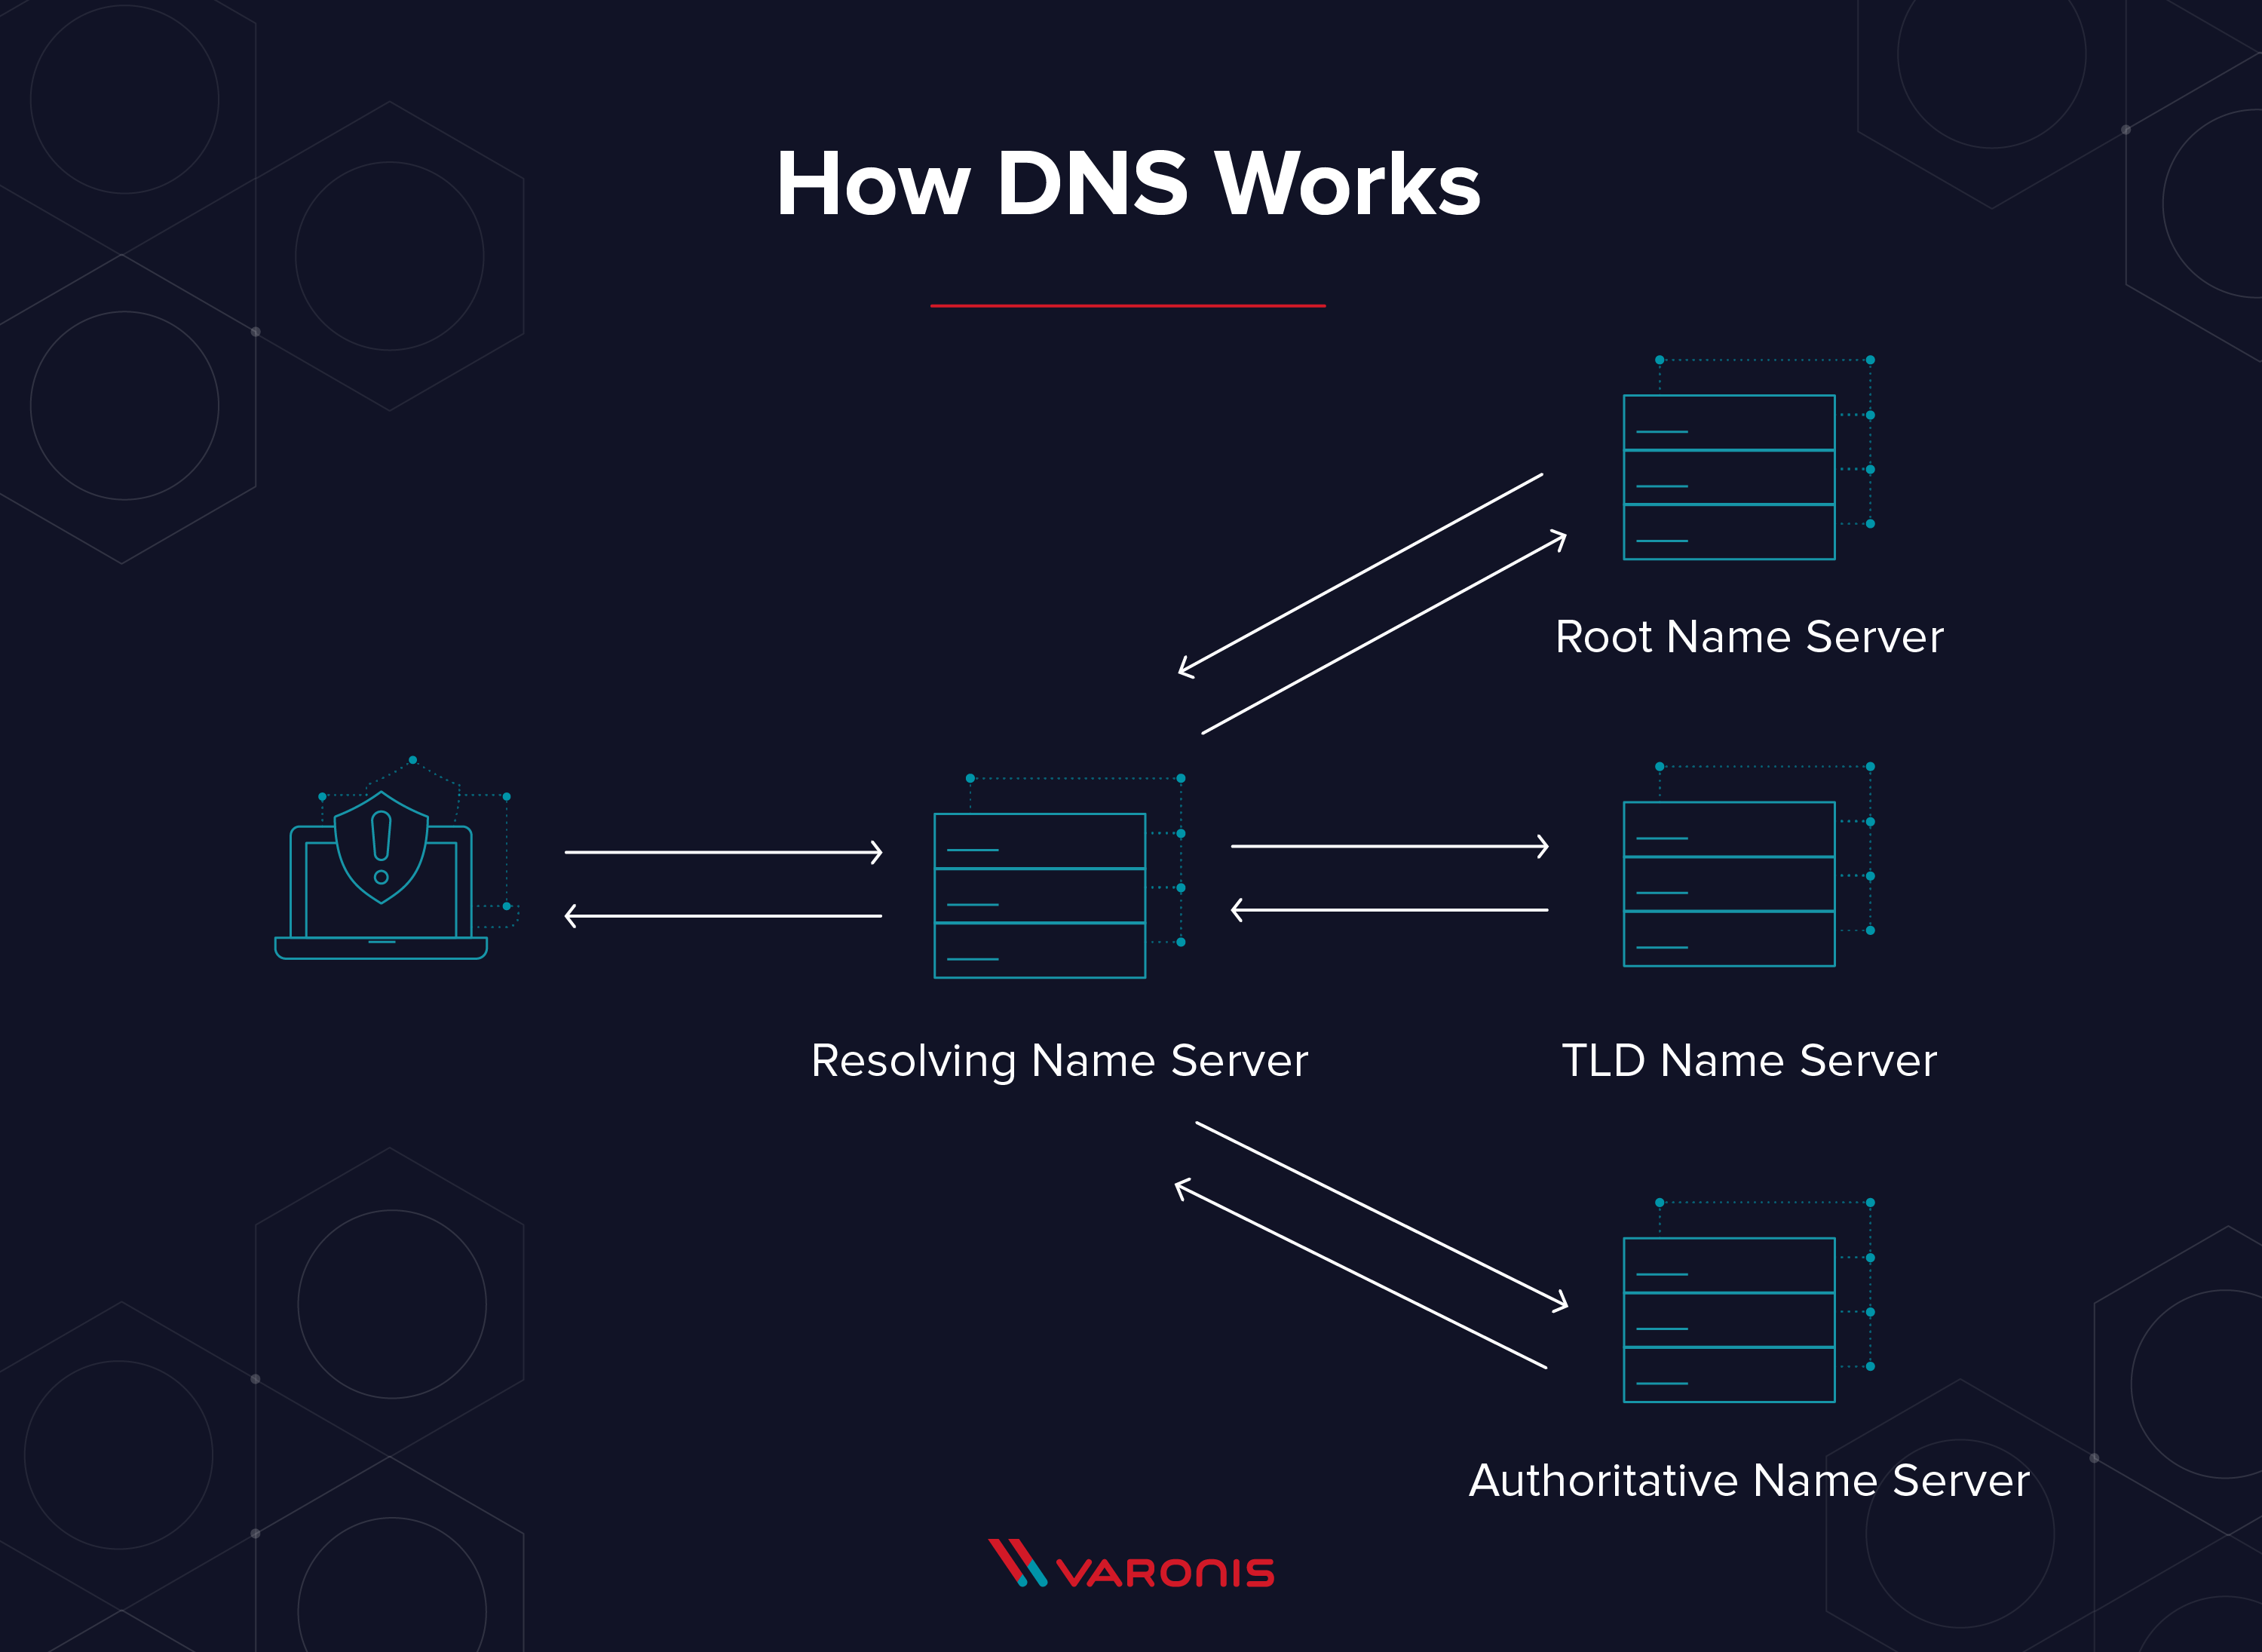
The Domain Name System (DNS) serves as the internet’s phonebook, translating domain names into IP addresses so browsers can load websites. Without properly configured DNS records, websites may become inaccessible, emails may not be delivered, and services may not function as expected.
In cPanel, users can manage DNS records using the Zone Editor, which allows them to create, modify, or delete different types of records, including A, CNAME, MX, TXT, and more. A solid understanding of DNS management ensures website stability, email reliability, and efficient domain configuration.
2. Common Types of DNS Records in cPanel
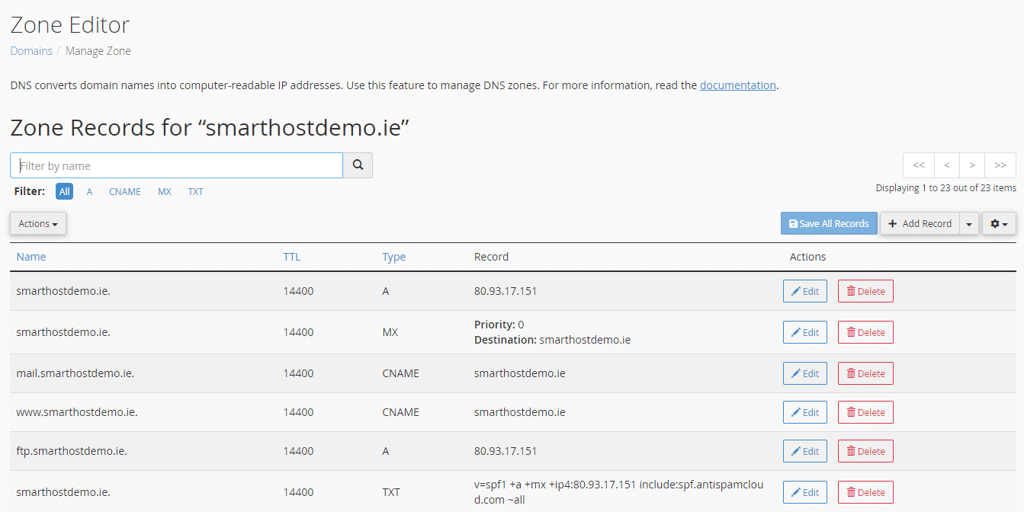
cPanel supports various DNS records, each serving a specific function:
- A Record (Address Record) – Links a domain or subdomain to an IP address.
- CNAME Record (Canonical Name Record) – Points one domain to another, useful for aliasing.
- MX Record (Mail Exchange Record) – Directs email traffic to the correct mail server.
- TXT Record (Text Record) – Stores text-based information, often used for domain verification and security.
- NS Record (Name Server Record) – Specifies the authoritative name servers for the domain.
- SRV Record (Service Record) – Defines specific services for a domain, such as VoIP or chat protocols.
Each record type plays a crucial role in website and email functionality, and misconfigurations can lead to disruptions.
3. How to Access the DNS Zone Editor in cPanel
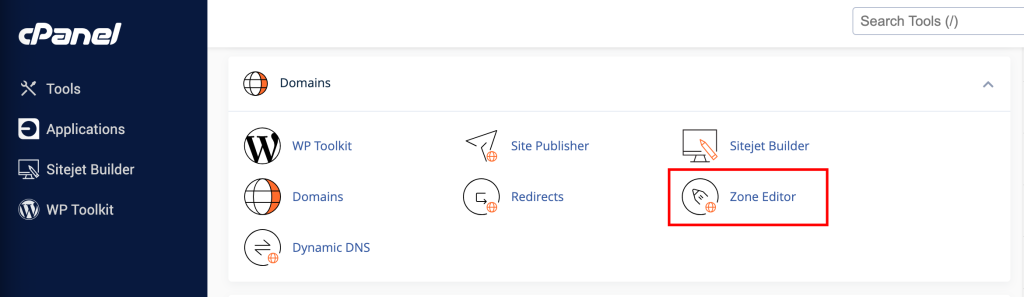
To manage DNS records, users must first access the DNS Zone Editor in cPanel:
- Log into cPanel – Use your hosting provider’s cPanel login credentials.
- Navigate to the Zone Editor – Scroll down to the Domains section and click on Zone Editor.
- Select the Domain – Choose the domain for which you want to manage DNS records.
Once inside the Zone Editor, users can view existing records, add new ones, and modify settings based on their needs.
4. Creating and Modifying DNS Records in cPanel
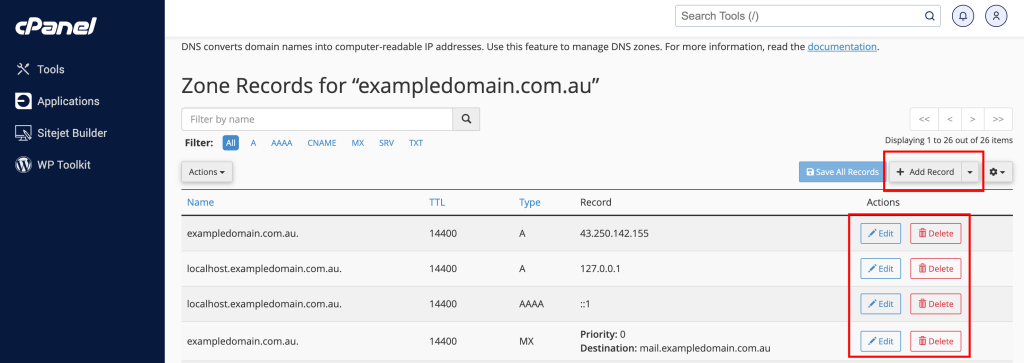
Creating or modifying DNS records in cPanel is a simple process:
Adding a New DNS Record
- Click on "Manage" next to the domain in the Zone Editor.
- Select the Record Type – Choose A, CNAME, MX, TXT, or other record types.
- Enter the Record Details – Specify the hostname, value (e.g., IP address or alias), and TTL (Time to Live).
- Click "Add Record" – The new DNS record is now active.
Modifying an Existing DNS Record
- Find the Record – Locate the record in the Zone Editor.
- Click "Edit" – Modify the necessary fields.
- Save Changes – Click Save Record to apply the updates.
Changes to DNS records can take up to 24–48 hours to propagate globally, though they often update much faster.
5. Troubleshooting Common DNS Issues
After modifying DNS records, users may experience issues. Here are some common problems and their solutions:
- Website Not Resolving – Ensure the A record points to the correct IP address. Flush DNS cache or wait for propagation.
- Email Not Working – Verify MX records are correctly configured for the mail provider.
- SSL Errors – Check that CNAME or A records do not conflict with SSL settings.
- Propagation Delays – Use tools like Google Public DNS or What's My DNS to check propagation status.
If DNS issues persist, contacting the hosting provider for assistance is recommended.

6. Best Practices for Managing DNS Records
To maintain a stable and secure DNS configuration, follow these best practices:
- Backup DNS Records – Before making changes, save a backup of current DNS settings.
- Use Low TTL for Testing – Reduce TTL values temporarily to speed up propagation during changes.
- Verify Entries Carefully – Ensure all record values are correct before saving changes.
- Monitor DNS Propagation – Use online tools to track DNS updates worldwide.
- Keep Name Servers Updated – Use authoritative and reliable name servers for better performance.
By following these guidelines, users can ensure their domains function correctly and avoid unnecessary downtime.


You must be logged in to post a comment.