
Table of Contents
- Introduction to JetBackup and Its Benefits
- How to Access JetBackup in cPanel
- Creating a Full Website Backup Using JetBackup
- Setting Up Automated Backup Schedules
- Restoring Your Website from a JetBackup Backup
- Best Practices for Website Backups
1. Introduction to JetBackup and Its Benefits
JetBackup is a widely used backup solution integrated into cPanel that enables website owners to back up and restore their websites easily. It offers a user-friendly interface and a range of powerful features, including automated backups, incremental backups, and remote storage options.
Key Benefits of JetBackup:
- Automated Backup Scheduling – Set regular backups to avoid data loss.
- Full and Incremental Backups – Save space by only backing up changed files.
- Easy Restoration – Restore entire websites or specific files in a few clicks.
- Remote Storage Support – Store backups on external servers for added security.
Understanding how to use JetBackup effectively ensures the safety of your website's data and helps you quickly recover from unexpected failures, hacking attempts, or accidental deletions.

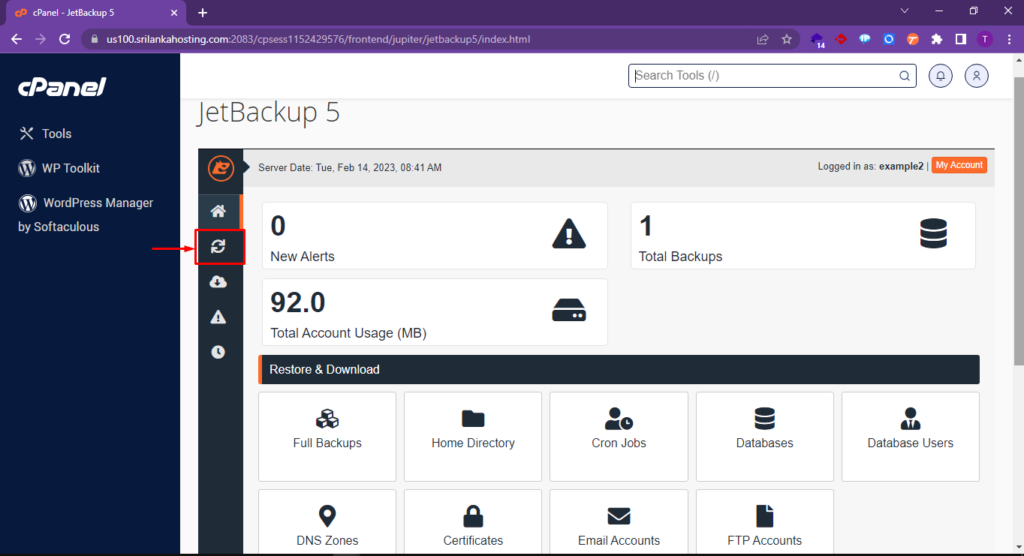
2. How to Access JetBackup in cPanel
To start using JetBackup, follow these steps to locate it within cPanel:
- Log in to cPanel – Access your hosting account and enter your cPanel dashboard.
- Locate the JetBackup Section – Scroll down to find the JetBackup module under the “Files” section.
- Open JetBackup – Click on the JetBackup icon to enter the main backup interface.
Once inside JetBackup, you can manage existing backups, create new ones, and configure automated schedules.
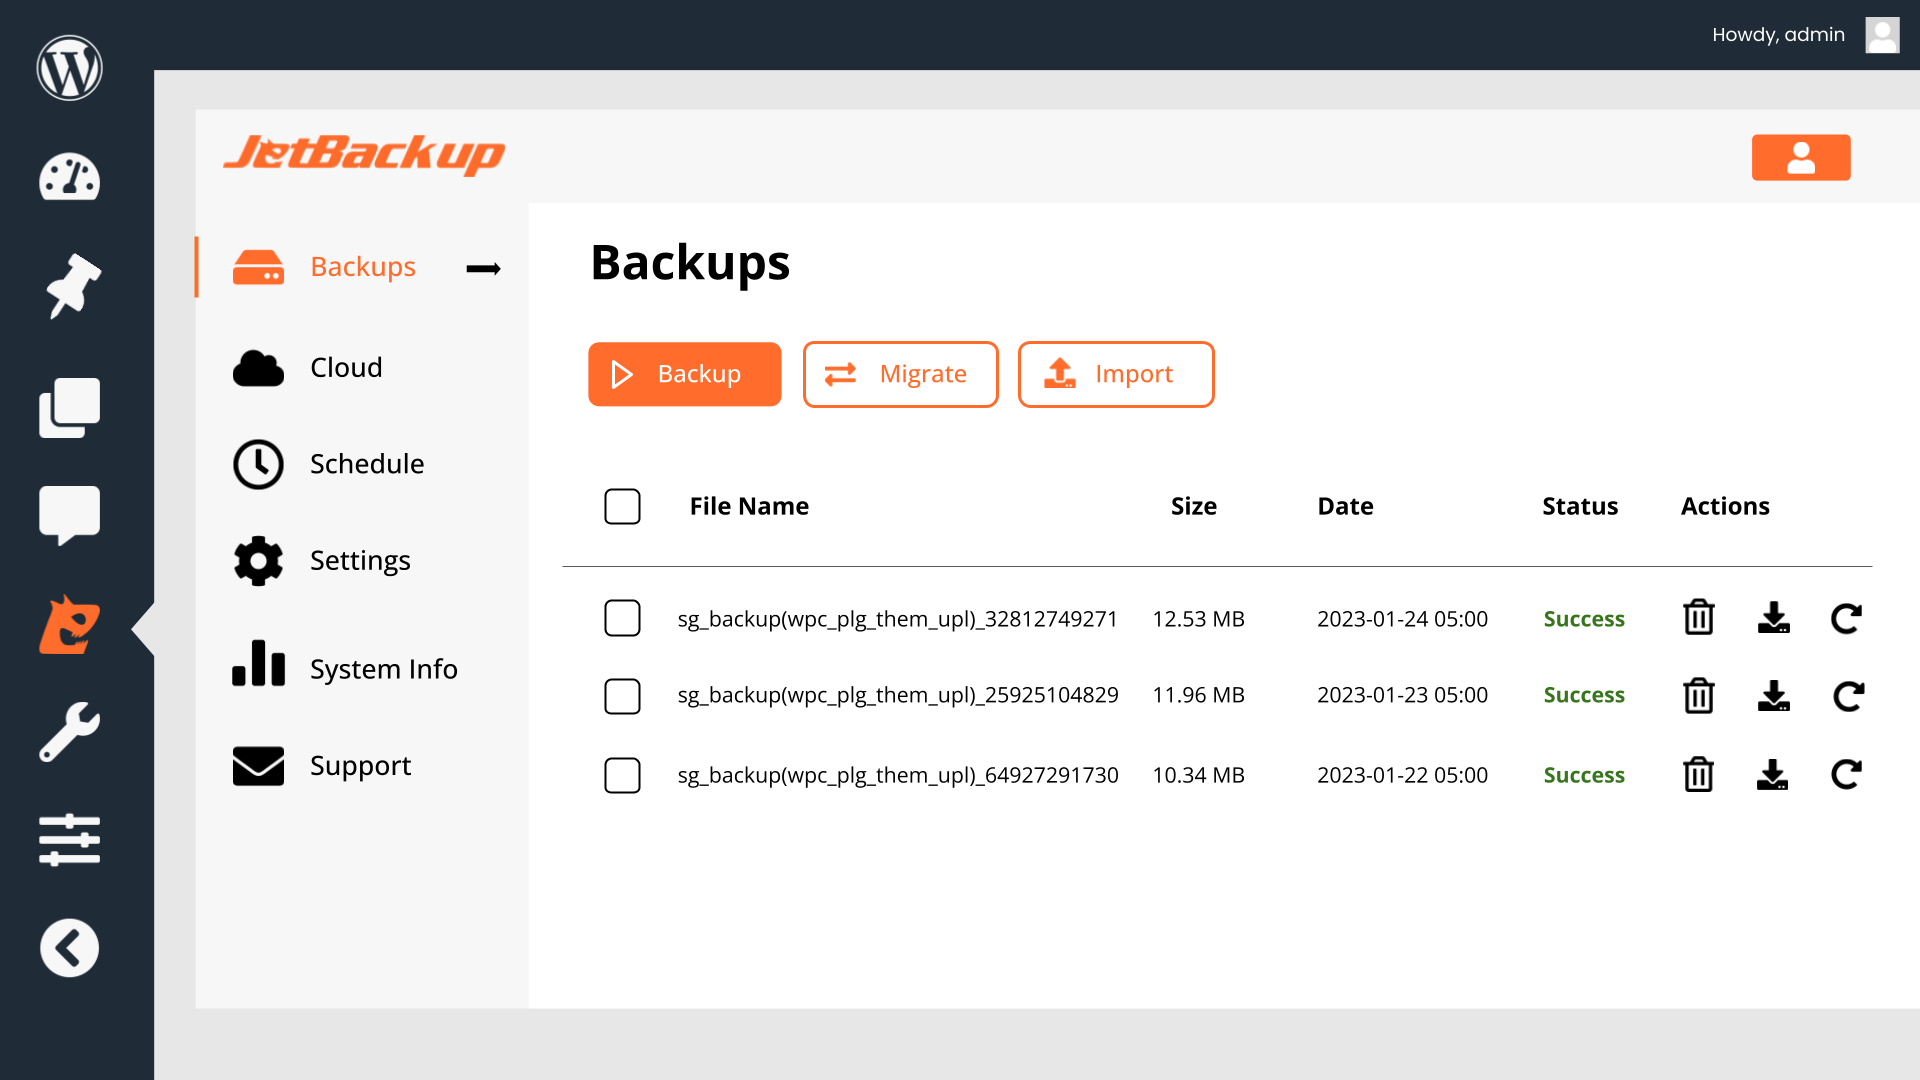
3. Creating a Full Website Backup Using JetBackup
A full website backup includes all website files, databases, emails, and configurations. Follow these steps to generate a complete backup:
- Go to JetBackup in cPanel – Open the JetBackup tool from the cPanel dashboard.
- Select "Full Account Backup" – This option ensures that all data, including files, databases, and emails, are backed up.
- Click on "Generate Backup" – JetBackup will start the process and notify you when it’s complete.
- Download the Backup – Once completed, click on the backup file to download it to your local storage for extra security.
By performing a full website backup, you can safeguard all essential data, making recovery quick and hassle-free.
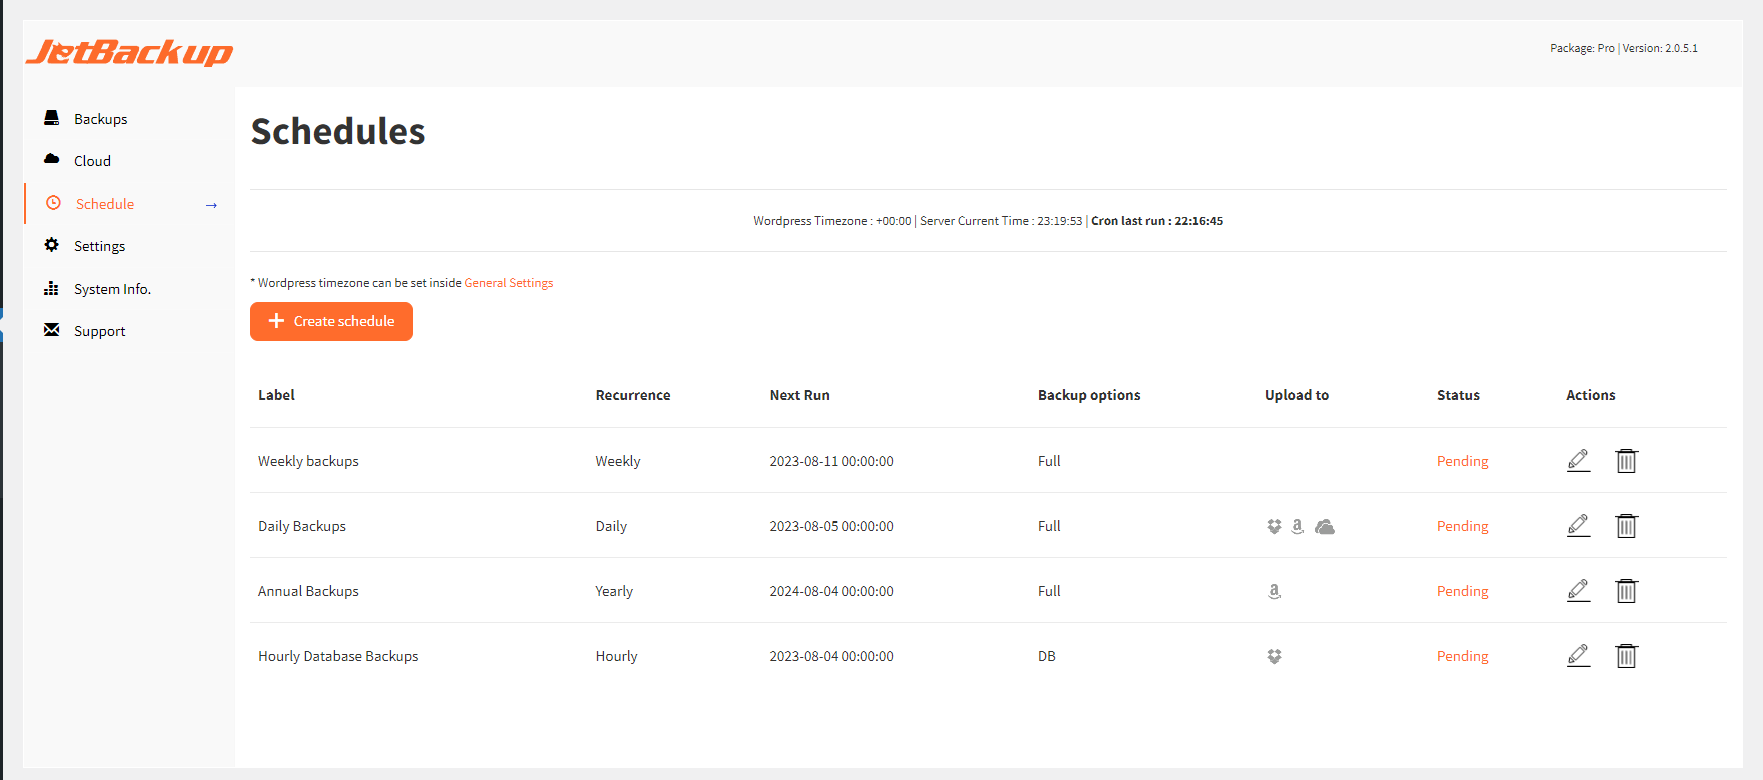
4. Setting Up Automated Backup Schedules
Regular backups help maintain website security and data integrity. JetBackup allows you to automate backups with the following steps:
- Open JetBackup in cPanel
- Navigate to "Backup Jobs" – This section allows you to configure automated backups.
- Click "Create New Job"
- Choose Backup Frequency – Select how often backups should run (daily, weekly, or monthly).
- Select Backup Destination – Choose where to store backups (local server, remote FTP, or cloud storage).
- Set Retention Period – Specify how many backups should be retained before older ones are deleted.
- Enable and Save – Click "Save" to activate automatic backups.
By scheduling backups, you ensure your website data is always recoverable in case of an emergency.
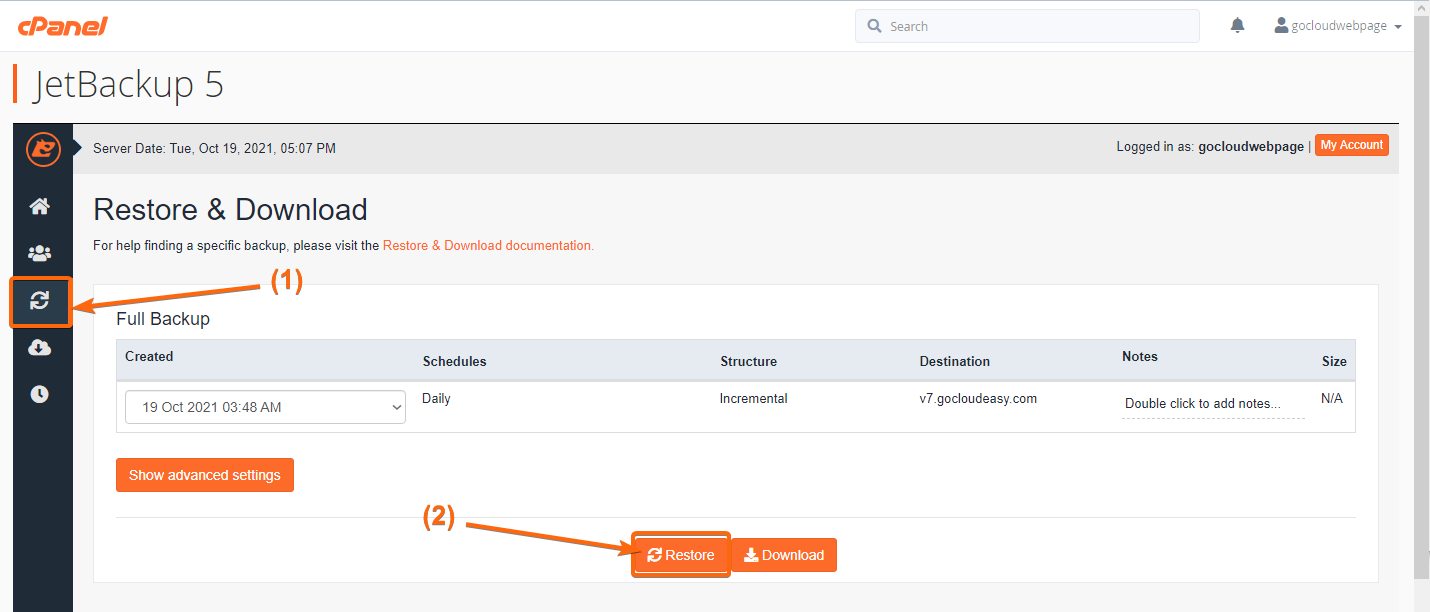
5. Restoring Your Website from a JetBackup Backup
If your website experiences data loss, JetBackup allows you to restore it quickly:
- Open JetBackup in cPanel
- Go to “Available Backups” – Here, you’ll see a list of existing backups.
- Choose the Backup to Restore – Select the most recent backup or a specific date.
- Click "Restore" – Confirm the restoration process, and JetBackup will begin restoring your website.
- Wait for Completion – Once done, verify that your website is functioning correctly.
Restoring from a backup can quickly recover lost data and get your website running again with minimal downtime.
6. Best Practices for Website Backups
To enhance the security and reliability of your backups, follow these best practices:
1. Store Backups in Multiple Locations
Always save backups in different locations, such as local storage, cloud services (Google Drive, Dropbox), or remote FTP servers.
2. Maintain Backup Frequency
Adjust backup frequency based on website activity. High-traffic websites should have daily backups, while others can opt for weekly or monthly backups.
3. Verify Backups Regularly
Check and test backups periodically to ensure they are complete and restorable.
4. Use Secure Backup Storage
Protect stored backups with encryption and access control to prevent unauthorized access.
5. Keep Multiple Backup Versions
Maintain several versions of your backups in case a recent version contains corrupted or compromised data.
By implementing these best practices, you can ensure that your website remains secure and recoverable at all times.


You must be logged in to post a comment.