
Python Selector plugin.
NOTE:
Python Selector icon in the end-user interface is hidden when python is disabled.
End User interface allows end users to set up and manage Python for their web applications.
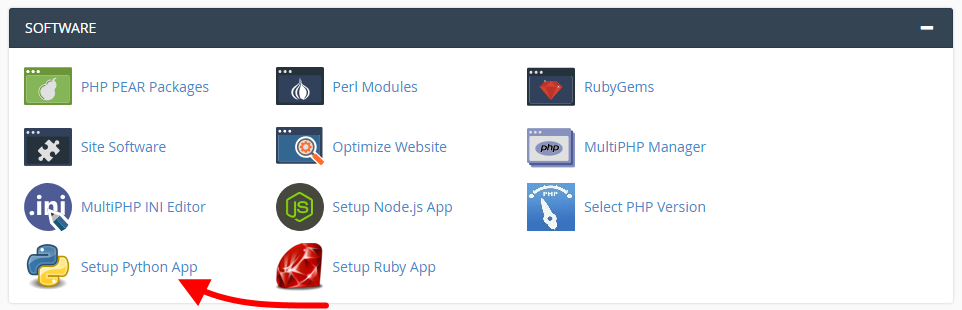
Login to your hosting control panel and then find the setup python application if you couldn't find it contact your hosting provider.
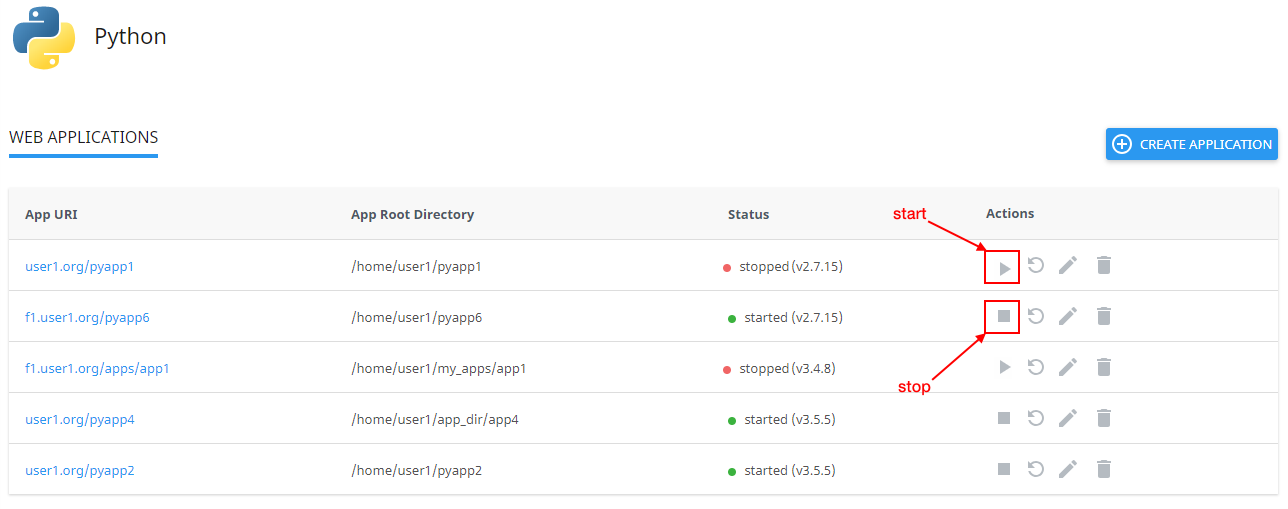
Web Applications page is displayed.
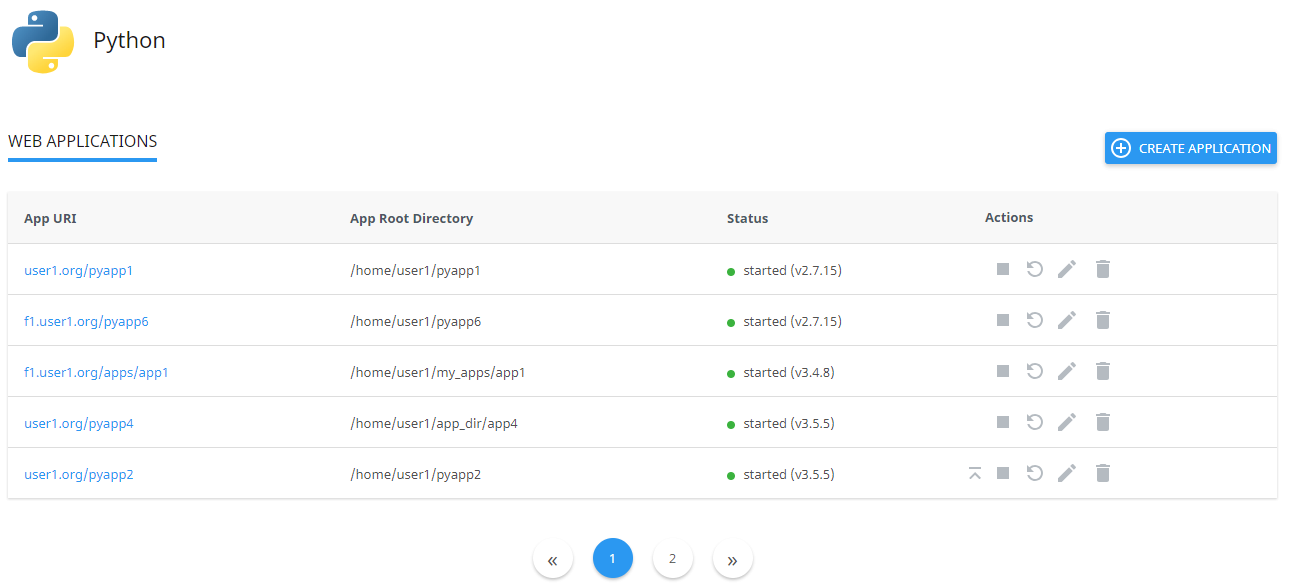
There are several columns in the list:
- App URI — application URI including the domain.
- App Root Directory — application root directory relative to the user's home.
- Status — started/stopped — displays if an application is running or not and the version of the application.
- Actions — allows to migrate, start, restart, stop, edit, and remove a particular application.
How to manage an application
Create application
- Click Create Application to create an application. The Create Application tab opens.
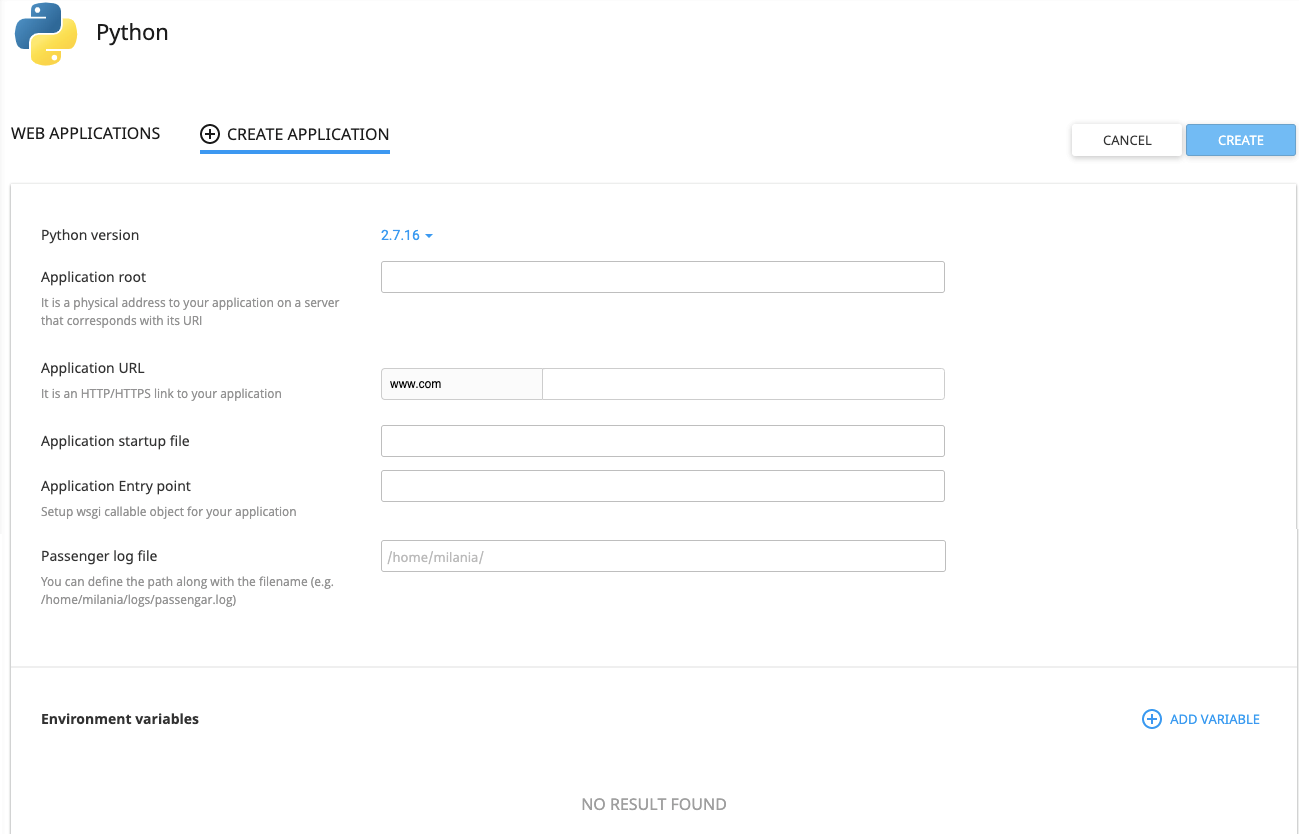
- Specify the following:
- Python version — select from the dropdown (required);
- Application root — physical address to your application on a server that corresponds with its URI (required);
- Application URL — HTTP/HTTPS link to your application (optional);
- Application startup file — the file where WSGI callable object is located. It is required for the application to run. Default is passenger_wsgi.py;
- Application Entry point — WSGI callable object for your application (optional). Default is application;
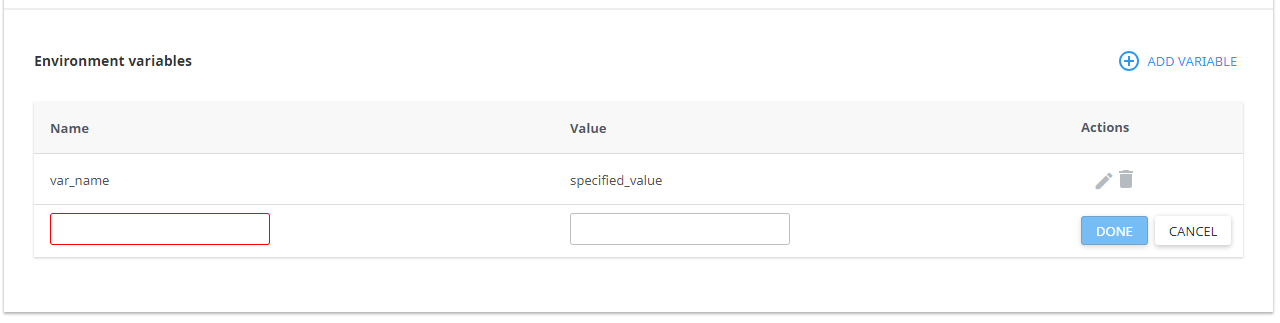
Optionally, add an environment variable. To do so, click Add Variable and specify the variable name and value, then click the Done or Cancel to close an adding form.
To delete or edit an environment variable, click Bin or Pencil for the required variable.
Start application
To start a stopped application do the following:
- Click Start in the Actions column in a stopped application row.
- When an action is completed a Start changes to Stop.
Stop application
To stop a started application do the following:
- Click Stop icon in the Actions column in a started application row.
- When an action is completed a Stop changes to Start.
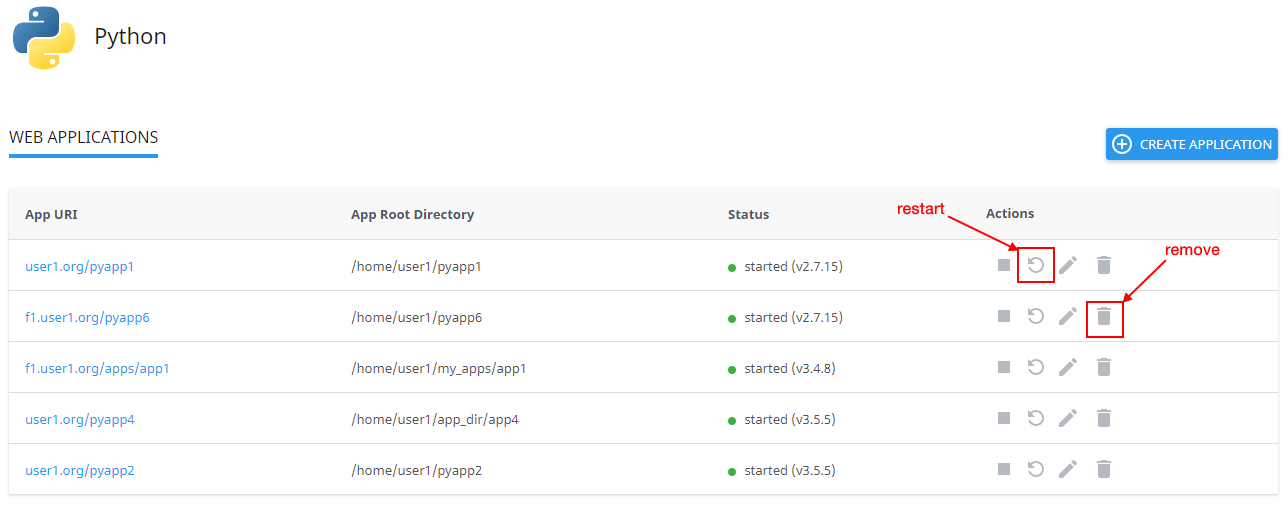
Restart application
To restart a started application do the following:
- Click Restart in the Actions column in a started application row. A current row is blocked and when a process is completed it will be unblocked.
Remove application
To remove application do the following:
- Click Bin in the Actions column in a particular application row.
- In the confirmation popup click Agree to start removing or Cancel to close the popup.
- When an action is completed an application will be removed from the Web Applications table and a confirmation popup will be displayed.
Edit application
To edit the application do the following:
- Click the Pencil in the Actions column in a particular application row. A particular application tab opens.
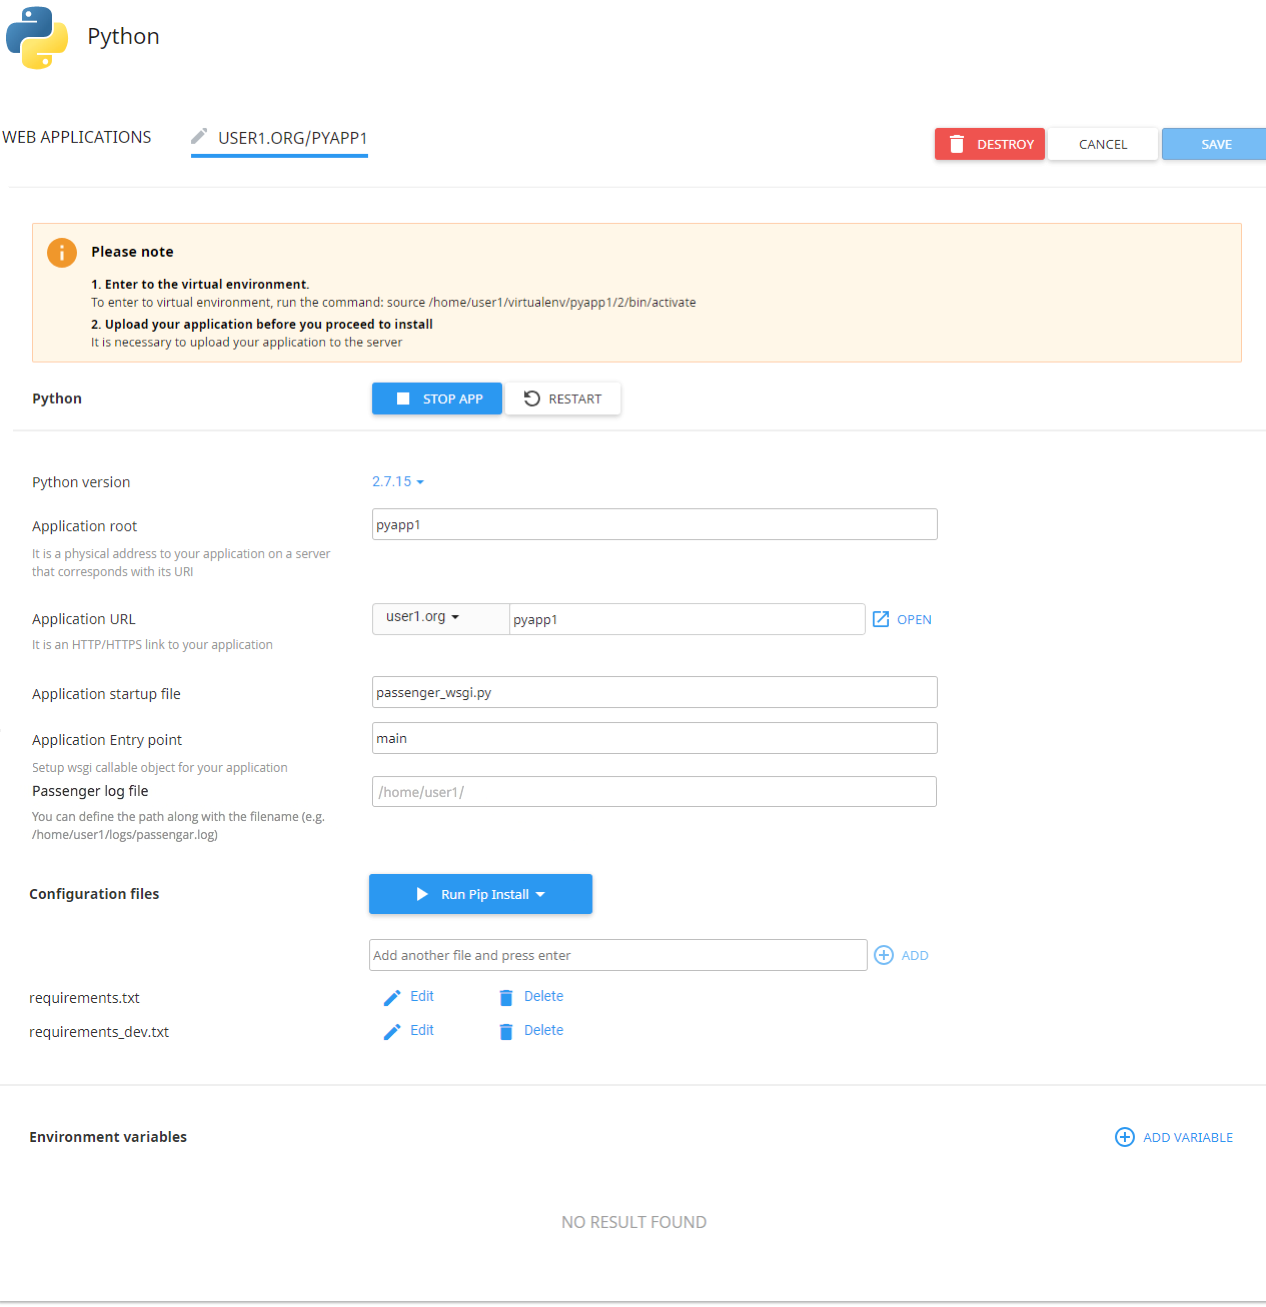
The following actions are available:
- Restart the application — click Restart.
- Stop application — click Stop App.
- Remove the application — click Destroy and confirm the action in a popup.
- Change Python version — choose the Python version from a dropdown.
- Change Application root — specify in a field a physical address to the application on a server that corresponds with its URI.
- Change Application URL — specify in a field an HTTP/HTTPS link to the application.
- Open Application URL — click the Open.
- Change Application startup file — specify as NAME.py file.
- Change Application Entry point — specify WSGI callable object for your application.
- Passenger log file — starting from CloudLinux Manager 5.1.0-2 you can set paths to Passenger logs for Python applications via UI (or using cloudlinux-selector utility).
- Run pip install command — click Run pip install to install the package(s) described in the configuration file.
- Add Configuration files — click Add and specify all required information.
- Edit available configuration file — click Edit, the file opens in a new popup.
- Remove the available configuration file from the list — click Remove and confirm the action or click Cancel to close the popup.
- Add Environment variables — click Add Variable and specify a name and a value.
Click Save to save all changes or Cancel to close the tab.

You must be logged in to post a comment.