Node.js Selector plugin
Note:
Node.js Selector icon in the end user interface when Node.js is disabled.
End User interface allows end users to set up and manage Node.js for their web applications.
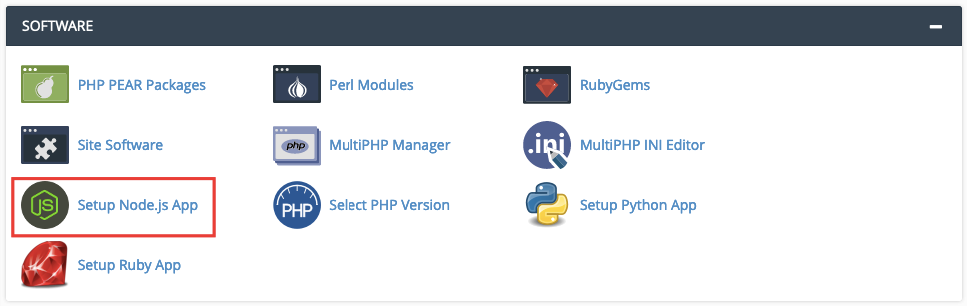
Go to cPanel → Software Section → Setup Node.js App.
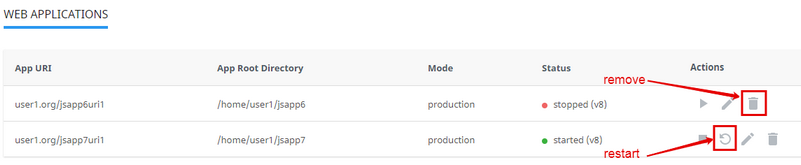
Web Applications page is displayed.
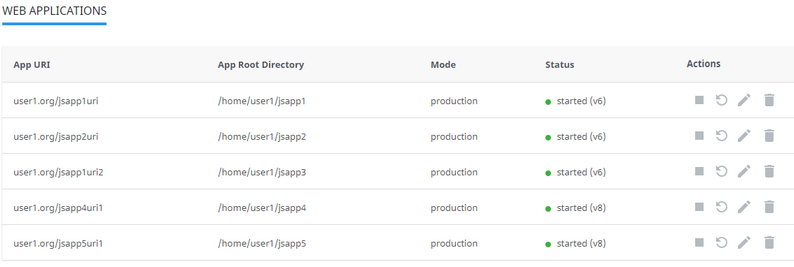
There are several columns in the list.
- App URI — application URI including the domain.
- App Root Directory — application root directory relative to user's home.
- Mode — can be production or development.
- Status — started/stopped — displays if an application is running or not and version of application.
- Actions — allows to start, restart, stop, edit, and remove a particular application.
How to manage the application
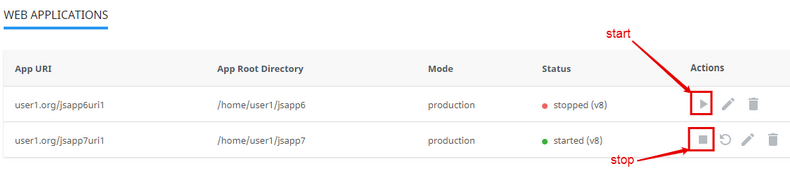
Start application
To start a stopped application do the following:
- Click Start icon in the Actions column in a stopped application row.
- When an action is completed a Start icon changes to Stop icon.
Stop application
To stop a started application do the following:
- Click the Stop icon in the Actions column in a started application row.
- When an action is completed a Stop icon changes to Start icon.
Restart application
To restart started application do the following:
- Click the Restart icon in the Actions column in a started application row. A current row is blocked and will be unblocked when a process is completed.
Remove application
To remove application do the following:
- Click Bin icon in the Actions column in a particular application row.
- In the confirmation pop-up click Agree to start removing or Cancel to close the pop-up.
- When an action is completed an application will be removed from the Web Applications table and a confirmation pop-up will be displayed.
Edit application
To edit application do the following:
- Click Pencil icon in the Actions column in a particular application row. A particular application tab opens.
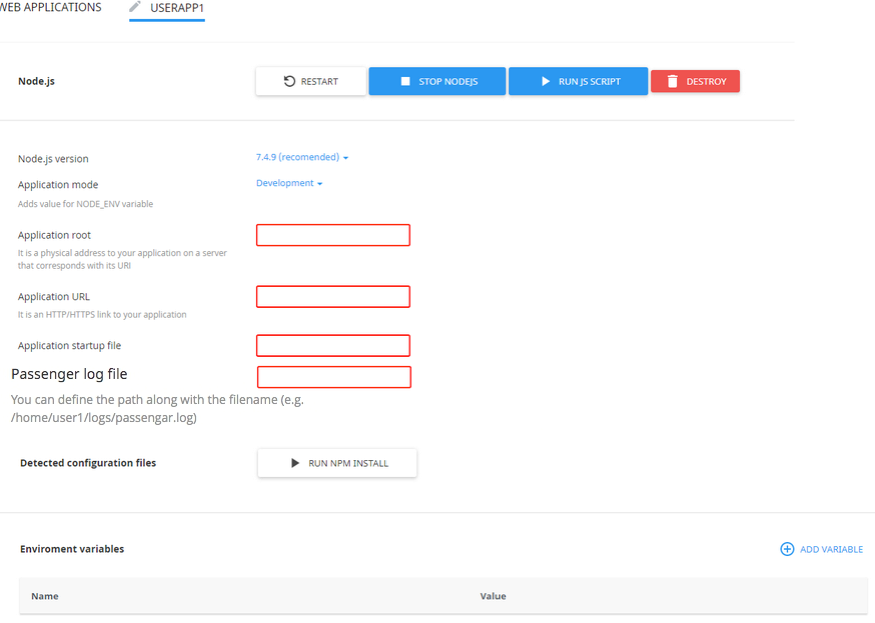
The following actions are available:
- Restart application — click Restart button.
- Stop Node.js — click Stop Node.js button.
- Run JavaScript script — click Run JS Script button to run a command specified in the Scripts section of the package.json file. Specify the name of the script to run plus any parameters then click Ok .
- Remove application — click the Delete button and confirm the action in a pop-up.
- Change Node.js version — choose Node.js version from a drop-down.
- Change Application mode — choose application mode from a drop-down. Available modes are Production and Development.
- Application root — specify in a field a physical address to the application on a server that corresponds with its URI.
- Application URL — specify in a field an HTTP/HTTPS link to the application.
- Application startup file — specify as NAME.js file.
- Passenger log file — starting from CloudLinux Manager 5.1.0-2 you can set paths to Passenger logs for Node.js applications via UI (or using cloudlinux-selector utility).
- Run npm install command — click the Run npm install button to install the package(s) described in the package.json file.
- Add Environment variables — click Add Variable and specify a name and a value.
Note:
You can also use Node.js Selector CLI.

You must be logged in to post a comment.